
Learn how to clean your HP printhead so you can keep your cartridges and printer running longer.
HP printheads clog periodically as small amounts of ink or dust dry up and collect in the nozzle. Faint, streaky or spotty prints are all common signs of a clog but a simple cleaning can usually get your HP ink cartridges working again. Printheads clog due to infrequent cartridge use. If you regularly go a few weeks without printing, your cartridges will eventually dry out and need to be replaced. Cleaning the printhead can prolong your cartridge life and hopefully delay that replacement cartridge purchase! In this guide we’ll explain how HP printheads work and show you the best way to keep them clean.
What is a printhead?
The printhead is a printer component that helps transfer ink onto the page. It does this by firing tiny droplets of ink via numerous printer nozzles to create a desired print. When one of these nozzles gets clogged your prints appear faded or streaky.


Printheads can either be a part of the printer cartridge or built into the printer – it all depends on which HP printer you own.
Type 1: Printheads that are built into the cartridge
Printer cartridges with a built-in printhead are called integrated printer cartridges. With this type, the nozzle plate (printhead) is built into the side of the cartridge. Every time you replace one of these printer cartridges you are also replacing the printhead, so if you are having a hard time with a particularly streaky cartridge, swapping it out with a brand new cartridge will usually solve your print quality problem. HP only sells integrated printer cartridges in black and tri-color and they are often used in cheaper Deskjet and ENVY printer models like the Deskjet 1112 or the ENVY 7855.

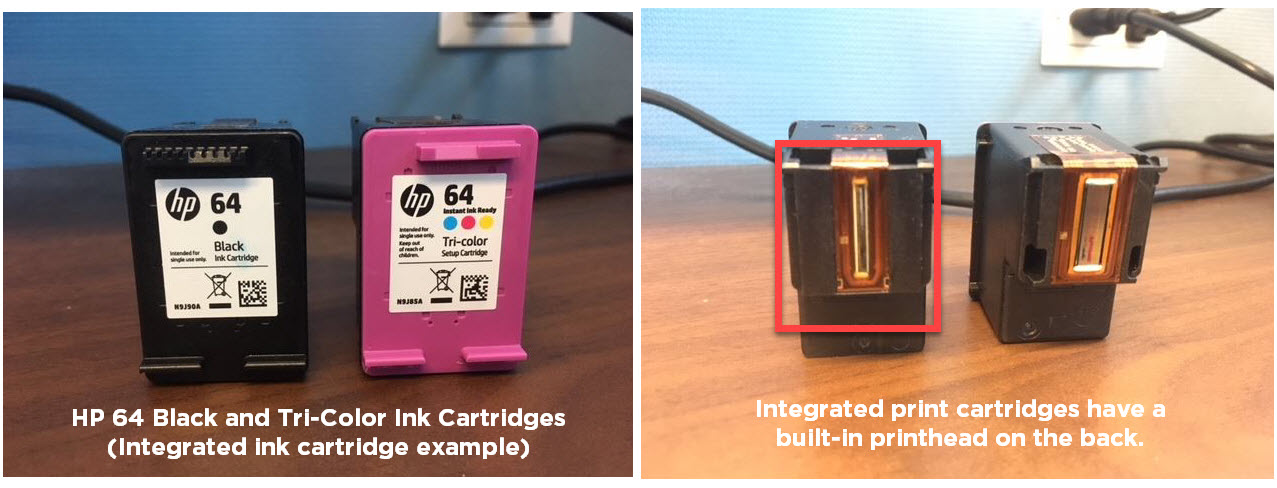
Integrated ink cartridge examples:
HP 61 series, HP 62 series, HP 63 series, HP 64 series, HP 65 series and HP 67 series
Type 2: Printheads that are built into the printer
HP printheads that are built into the printer use individual ink cartridges to create a print. The nozzle plate (printhead) for these types of cartridges is included in the printer and the cartridges install into that printhead to create a print. These kinds of printheads require replacement after long term use – however- since most printheads cost upwards of $100 and some replacements can be hard to find, it is usually cheaper to just buy a new printer.

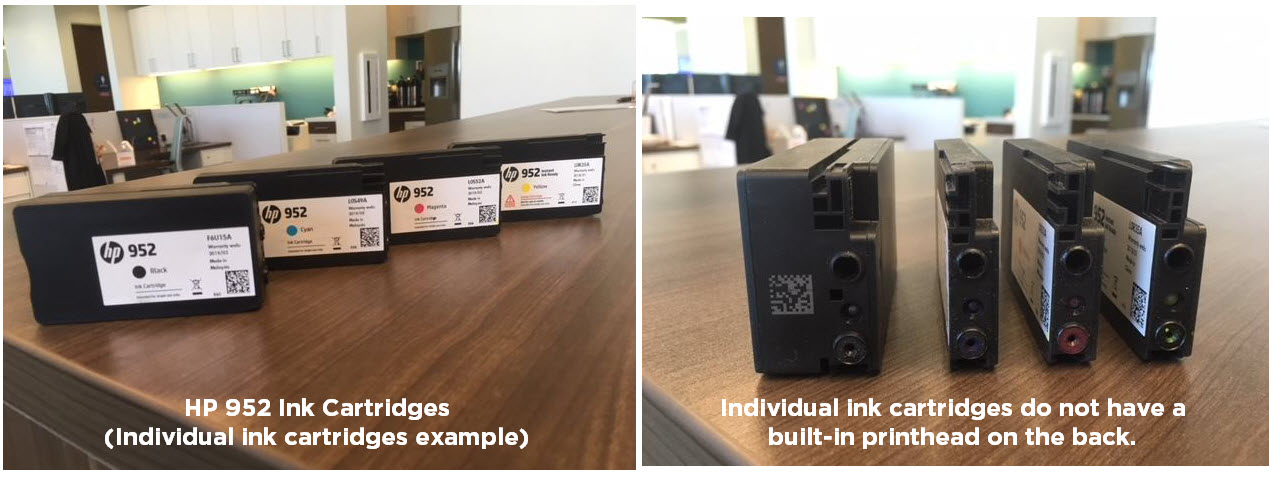

Individual ink cartridge examples:
HP 902 series, HP 952 series, HP 910 series, HP 962 series

How to automatically clean an HP printhead
The easiest way to resolve your print quality issue is by running a cleaning on your printer. The cleaning function is included in the software of every HP printer model and is usually found under the “printer maintenance” section of your printer’s display menu. Consult your printer manual for specific instructions for you machine.

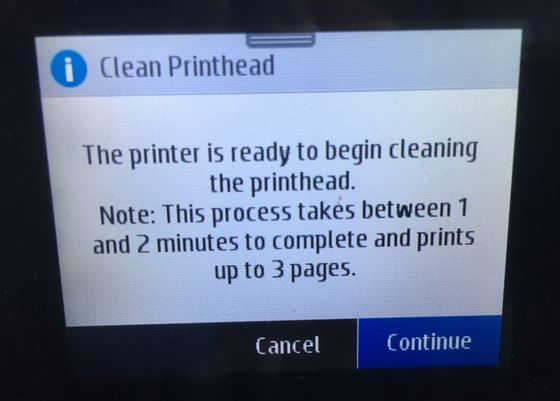
Printhead cleanings can take about 1 or 2 minutes and they do use some ink to run through the cleaning process. Once complete, print out a test page to compare print quality. If the print results look good, you can continue printing. If the colors are not up to par, you may have to run the printhead cleaning function 2-4 more times before print quality is reestablished. If you still aren’t getting quality prints after a few cleanings, move on to our manual cleaning instructions. You don’t want to run the cleaning function too often because it will deplete the ink in your cartridges.
How to manually clean an HP printhead
Before we continue, you need to know that some HP inkjet printers come with a built-in printhead separate from the ink cartridges, and there are also some HP inkjet printers with printheads built into the individual ink cartridges.
Cleaning printheads built into printer
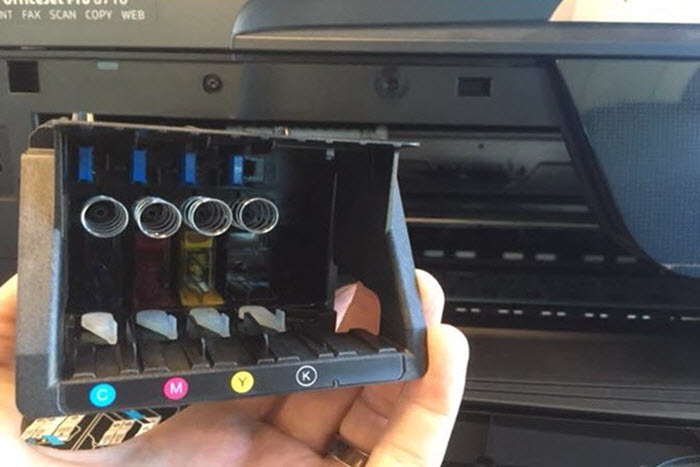
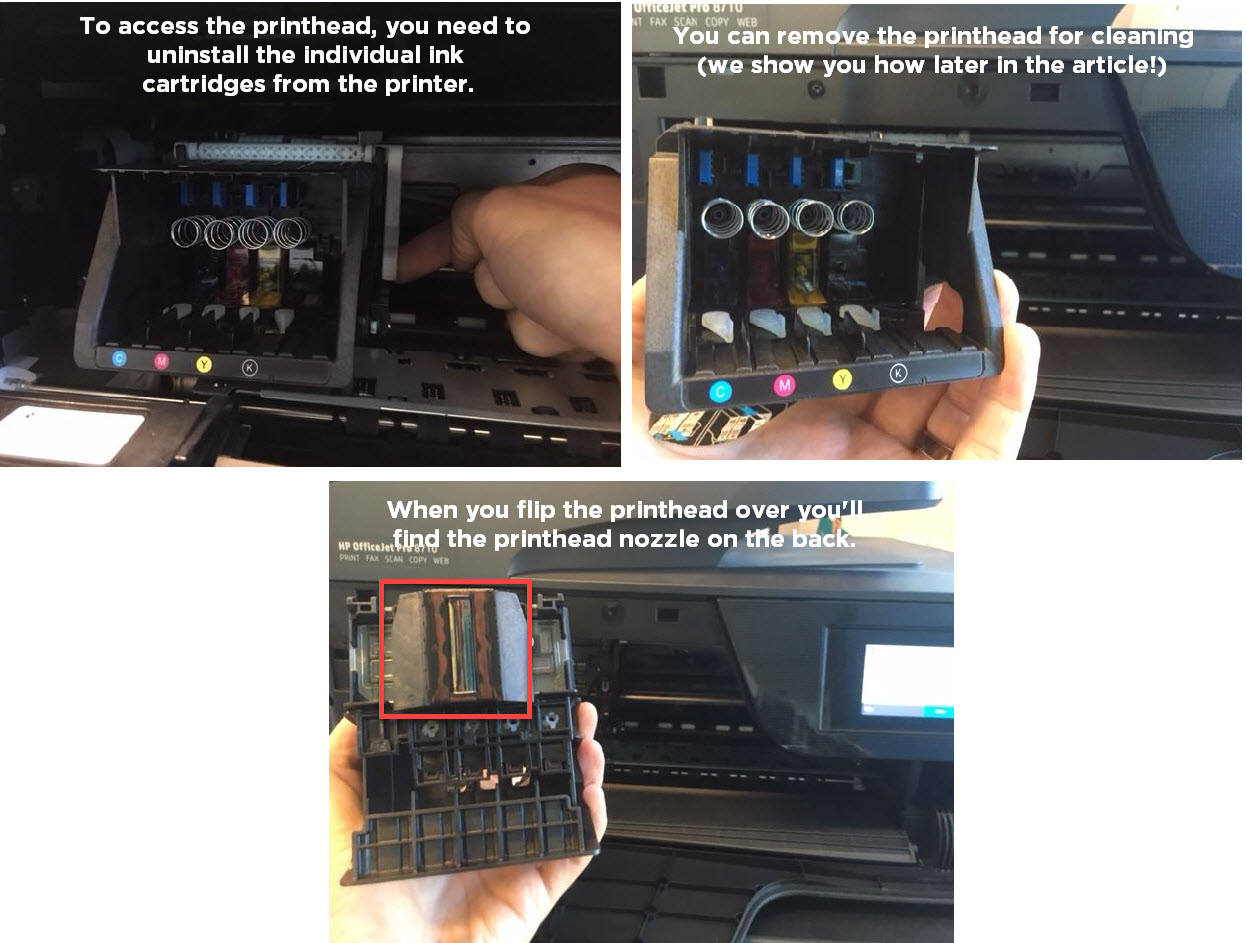
Manually cleaning a printhead that is built in to your printer takes a bit more work. The steps below are for HP printers that have a removable printhead, like the HP OfficeJet 8710. You can also uses this method on non-HP printers with printheads built into the printer.
Required supplies: a plastic container, a couple of dry paper towels, a lint-free cloth and filtered or distilled hot water.
- Fold the dry paper towel into quarters and place it in the plastic container
- Pour about two inches of hot water on top of the paper towel so that it is completely submerged
- Open up the printer and remove all of the ink cartridges from the machine
- Set the cartridges aside on a separate paper towel while you continue the printhead cleaning process. Make sure the cartridges are facing up on the paper towel.
- Lift up on the gray latch behind the cartridge carriage that holds the cartridges. This will release the printhead from the printer.
- Pull the printhead up and out to remove it from the machine.
- Dampen the lint-free cloth with hot water.
- Gently wipe away an excess ink on the printhead nozzle.
- Place the printhead in the container with the submerged paper towels. The nozzle should be facing down. Be careful not to touch the nozzle as it can be damaged easily.
- Let the printhead soak for about ten minutes. Then remove it from the container and set it on a dry paper towel to dry for fifteen minutes. The nozzle should be facing up.
- Reinstall the printhead back into the printer. Don’t forget to secure the latch! Then reinstall the cartridges and run the cleaning function on the machine again.
Cleaning printheads built into ink cartridges
If your printer uses cartridges with an integrated printhead, you can try the “paper towel method” to resolve your print quality issue.
Required supplies: A warm, damp paper towel and a dry paper towel

- Take a warm damp paper towel or coffee filter and blot the cartridge with the printhead facing down onto the paper towel. This will remove any dried ink on the printhead.
- Then, hold the cartridge with the printhead facing down against a dry paper towel for 2-3 minutes. A dry paper towel will wick the ink out. Do not wipe the print head as this may cause damage.
- Reinstall the cartridge and try printing again. If you are still getting poor print results at this point, you may need to replace your printer cartridge.
Now that you know how to clean your HP printhead you have all the tools you need to ensure your cartridges remain in top shape. If you try these cleaning steps and still have trouble with print quality, you may need to replace the printhead. For printers that use integrated cartridges, that means buying a new printer cartridge. For printers that have a built-in printhead, you’ll need to buy a brand new printhead, which can be a bit expensive. Like we mentioned earlier, most consumers just end up buying a new printer since it’s usually cheaper than a printhead replacement! If you have any questions about cleaning your HP printhead, feel free to drop us a line in the comments.


