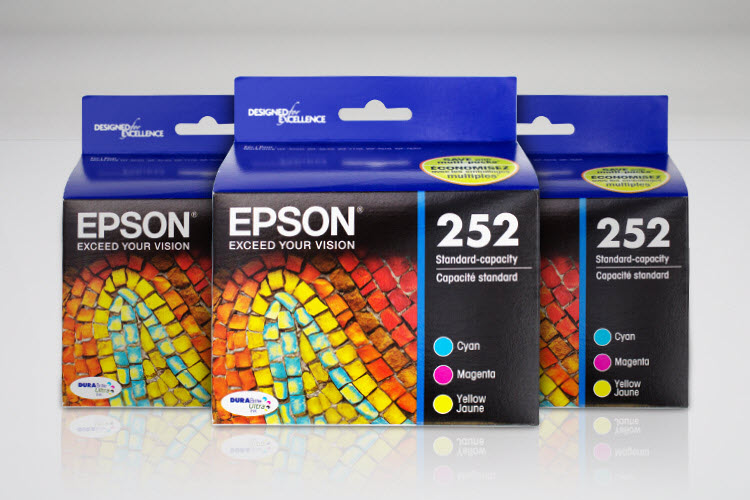
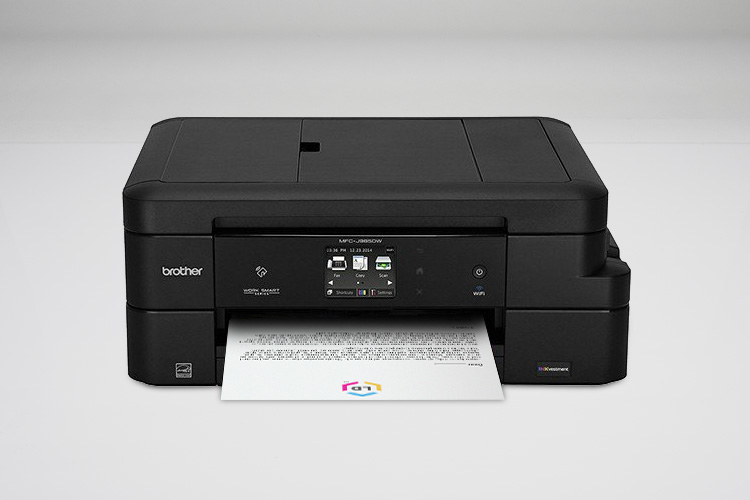
Epson offers a broad range of different models designed to suit your business or personal printing needs. They offer printers with all-in-one capabilities, photo quality, and high-speed laser in monochrome and color. Epson printers are all mostly diverse in that no two models are designed to function in the same way, though similar product lines will share component pieces designed to encourage their intended use. The same applies to Epson ink cartridges, which will vary in their ink capacity and composition, though they are usually around the same size and shape—thin, tall, and rectangular. Installing new printer cartridges in Epson printers is pretty straight forward. I will be discussing the process using the Epson Workforce WF-3640 printer, which uses the popular Epson 252 ink cartridge, as my example. If any step doesn’t match up with what you’re seeing with your model, consult your owner’s manual for more precise details and instructions.
A. Checking Ink Levels
If your printer isn’t alerting you to replace any cartridges and you wish to know which cartridges need replacing, you can check your printer’s ink levels by following these steps:
- Press the Home Button (HOUSE icon).
- Go to Setup then hit the OK button.
- You’ll see Ink Levels as the first option so simply hit the OK button.
- You can now see your printer’s ink levels on the LCD screen.
B. Installing New Epson Ink Cartridges
Before you begin, it’s important that you have your replacement cartridges on hand before you remove the empty ones. Leaving your print head exposed to open air can lead to clogs that are difficult to clean, and may result in the need for replacement.
- Turn on your printer unit using the power button.
- If you already have empty cartridges, you will see a message on your LCD screen noting which cartridges need replacement. Hit “PROCEED” and follow the instructions on the screen.
- If you are replacing a cartridge before it is empty:
- Press the Home button (HOUSE ICON).
- Go to Setup then hit OK.
- Scroll to Maintenance then hit OK.
- Scroll to Ink Cartridge Replacement then press OK.
- Lift up the scanner unit (not just the scanner cover), to expose the ink cartridges.
- Wait for the printhead to stop before taking out the cartridges.
- IMPORTANT: Be careful NOT to TOUCH the printhead and the flat white cable inside the printer.
- Squeeze the tab at the back of the cartridge you want to replace toward you and pull the cartridge straight up. It should slide out easily with a little wiggling at most. Be careful when you handle the spent cartridge, as leftover ink residue can stain your clothing, furniture, carpet, or hands. If you get ink on your hands, wash it thoroughly with soap and water. In the event ink sprays into your eye, flush it with cool water until clean. Keep ink cartridges out of the reach of children for all the reasons listed above.
- Gently shake your replacement cartridge up and down four or five times while it’s still in its sealed wrapper. Shaking helps redistribute the ink throughout the cartridge if it has settled.
- Remove it from the plastic package.
- Remove the yellow tape that seals the cartridge. This yellow tab is the only thing you should take off. DO NOT take anything else off.
- Do not remove the other seals as this will result in leaking.
- Do not touch the green chip on the cartridge.
- Do not remove the label.
- Insert the cartridge straight down into the carriage until it clicks. Repeat process for any other cartridges in need of replacement.
- Close the cartridge cover. Select “CHECK” on the LCD screen to make sure the cartridge is installed correctly. If so, close the scanner lid.
- Your printer unit will automatically start priming the new cartridge. Priming should take a few minutes. Once completed, you will see a message on your LCD screen saying that your printer is ready to print!
It’s important to note that installation instructions for some Epson inkjet printers might differ but they will follow the same basic steps. You can use the above instructions when replacing Epson 200 cartridges on the Epson Expression XP-310, XP-300, XP-400, and XP-410, Epson 220 cartridges on the Epson Expression XP-320, XP-420, XP-424, WorkForce WF-2630, WF-2650, WF-2660, WF-2750, WF-2760 printers.
C. Changing a Remanufactured Epson Cartridge
Reputable remanufactured and compatible cartridges come with chips designed to emulate those of original brand name cartridges to a T. In most instances, replacing your existing ink cartridge with a remanufactured or compatible cartridge involves the same process listed above, and your cartridge will be recognized without issue. On occasion, you’ll encounter connectivity issues that can usually be fixed in a couple of easy steps. The most common error message you’ll see when installing a compatible cartridge is one that reads “Low” or “Empty,” as though you didn’t just install a new, full cartridge at all. This message will often pop up when you install a new brand name cartridge sometimes, too, because your printer isn’t reading the new chip on the cartridge. Misreads will occur when there’s leftover ink on the sensor, as well as when the printer needs to be “reset.” Here’s how to do that:
- Remove the cartridge carefully. Remember, the inkwell is open and can spill, so you want to avoid jerking it out of the printer head too abruptly. Use a Q-tip or lint-free cloth to clean the gold chip on your cartridge. This chip is very sensitive—ink residue or dust can prevent it from interfacing with the printer cleanly, which produces errors.
- Power down your printer and unplug it from the wall for at least fifteen seconds. Wait for the printer to initialize, which may take a few seconds, and then install your freshly-cleaned cartridge back into the print carriage.
- If you’re still experiencing problems getting your printer to recognize your cartridge, there are a couple of other options:
- One, find a software solution. Using a freeware program called SSC Service Utility, users can reset ink cartridges from their desktop. You can also freeze internal ink counters, which helps you get all of the ink out of each cartridge. SSC Service Utility works with more than 100 Epson models.
- Another option is to purchase an ink cartridge reset tool. This inexpensive and reusable device acts as an interface between your cartridge chip and the printer to give refurbished and refilled cartridges the digital footprint of a new cartridge.
D. Refilling EcoTank Ink
One technology that sets Epson apart from the competition is EcoTank. Available for several printer models, EcoTank printers draw ink from refillable tanks instead of replaceable cartridges. They are designed to print cheaper than similar cartridge-based printer models and create less waste from spent cartridges (hence the “Eco-“). Refilling the tank is simple, but there are some procedures and precautions you should be aware of before you start:
- As mentioned above, avoid contact with your skin. If you get ink on your hands, wash thoroughly with soap and water. If ink gets in your eyes, flush them with cool water. In the event you get ink in your mouth, spit it out and consult with a medical professional.
- Epson does not recommend using ink that isn’t designed for your particular printer model. While this recommendation is meant to exclude third-party ink brands, I suggest confirming that the ink you are using is the right choice for an inkjet printer. Using ink designed for other types of print will clog your print head and give you poor print results.
- Refilling the EcoTank on an Epson Workforce ET 4500 is quick and easy. Here’s how you get started:
- Wear disposable gloves to avoid staining your hands. Keep damp paper towels on hand, and, in the event of a spill, wipe up the ink quickly to prevent permanent damage. If ink gets on your clothes, it may not come out, no matter how thoroughly you wash them.
- Place a sheet of paper under your printer to prevent ink splatter or spills from getting on your table or floor.
- Open the ink tank cover. Each ink pot has a cap that allows you to open up the well. Remove the cap and place it in the holder on the EcoTank. DO NOT put it on your table (or, worse, your pants) as it may have ink on it.
- Remove the tip on your new ink bottle and set it aside. Don’t lose track of it, though—you can replace it to save your leftover ink for later. If your ink bottle is sealed under the cap, very carefully remove the cap and peel away the plastic seal. Replace the cap, and you’re ready to start filling.
- Fill the ink tank for each color up to the top line on the ink tank. On the ET 4500, the colors go left to right Cyan > Magenta > Yellow > Black.
- Replace the cap on your ink bottle to store remaining ink. Put the bottle somewhere cool and dark, and leave it standing upright.
- Replace the cap on the ink tank and repeat for each color as needed.
- Close the cover, and you’re ready to print again!
Some EcoTank models use Ink Supply Packs rather than individual tanks, such as the R4640 model. This variety of bulk ink solution creates minimal waste and decreases the potential for catastrophic ink spills. Here’s how you install supply packs:
- When your ink pack is low or empty, a notification will pop up on your LCD screen indicating which ones require replacement. Individual ink colors have their supply bags of their own.
- Open the side compartment to reveal ink packs. Press the handle on the ink bag you are replacing, and it will pop out.
- Grab the handle and lift the bag straight up to remove it from the ink case.
- Unbox the new ink pack and remove any protective materials. Be sure not to touch the green chip on the handle area. Shake the ink pack from side to side horizontally around twenty times. Do not remove any labels or seals, as the ink can leak out.
- Insert the pack into the case, making sure the bottom of the ink bag fits into the base.
- Slide the handle on the ink pack onto the holder. Press in the handle until it clicks into place.
- Press “Check” on the LCD screen to ensure the ink packs are installed correctly.
- Close the ink case and you’re ready to print!
E. How to Save More and Print More with an Epson Printer
If you’ve browsed through the customer reviews of Epson printers, you’ll notice that most of them say the same thing: that Epson printers use up ink fast and Epson ink is expensive. While ink cartridges for newer Epson models have a lower price, they also have a low page count per cartridge making the cost per page still higher than average. So what’s a workaround to this dilemma?
Consumers have been switching over to compatibles more recently because of the price difference (up to 77% cheaper than original Epson cartridge prices) and because of the quality these alternative cartridges deliver. The aftermarket ink cartridge industry has been around for over a decade and have vastly improved their testing processes that they now guarantee compatible cartridges that can deliver a print output that’s practically indistinguishable from the original.
We hope to have answered your questions on installing / replacing new Epson ink cartridges. Browse our blog to find other super informational articles on how to take care of your ink cartridges.


Workforce 3620 Got message “Low ink level ” I mainly use black for text Replaced with new 252 cartridge quickly, Cleaned printhead twice,cleaned print nozzles.Other printers print a test sheet after alignment where colors are vivid Using same paper. Print is lighter & uneven Put old cartridge (abt. 60% level) same result Tried adjusing darkness, no improvement
I want to Refilling ink Epson L 100 printer but i can’t refilling ink. so display the massage “technical support’ why?
I’m trying to refill the ink cartridge on the Epson WF3620. I open the top but the part where I replace the ink doesn’t move far enough to the left to allow me to open it. Any suggestions?
Hi Peggie, you can find instructions for installing a new ink cartridge into your Epson WF3620 below. Hope this helps!
1. Touch the home button on the printer’s LCD screen.
2. Then, select the “set up” button that looks like a set of tools
3. Under the set up menu, select “maintenance”
4. Then, touch the button that says “ink cartridge replacement”
5. Open up the scanner on the printer to expose the cartridge access area
6. Wait a moment for the cartridge carrier to center
7. Lift the handle on the carrier to access the cartridges and gently remove the cartridge you want to replace by pulling it straight up
8. Remove the yellow tape on the new cartridge and insert it into the appropriate slot, you should hear a click
9. A message will pop up on the LCD screen saying ink cartridge replacement is complete, and you are all set.
Thank you for actually explaining what Epson fails to do regarding replacement of a cartridge and the multi-step process that should be a much simpler matter for a $60 printer (WF 2750). I’ve already had a lot of problems with this machine…never buying again. I don’t think I’d have figured this out without your explanation above.
I agree with you! Hardest machine to change INK Cartridge in the WORLD?
Thank you so much, your directions are very clear!
I have replaced several ink cartridges and now my printer wont work. I have looked and looked for directions to diagnose this problem and cant find an answer. help please.
Sounds like a printhead specially since your printer is an Epson. Have you tried cleaning your printhead? Here’s a link to the article we wrote about it: https://www.ldproducts.com/blog/how-to-clean-an-epson-printhead/
What model of Epson printer uses 702 ink cartrages?
The Epson WF-3720, WorkForce Pro WF-3730, and WorkForce Pro WF-3733.
I have a differnet computer . I did have a HP. I now have a Dell ,, my printer is Epson StylusNX230 / on my previous computer when ink cartridge needed replaced a screnn would come up showing which cartridge needed replaced. . on Dell he sends me a alert needed new ink but doesn’t show which cartridge. where do I find this info on DELL
My machine is telling me that the toner/ink needs to be replaced and I have just replaced the ink so I assume the problem is the toner, but I can find no information on how to replace the toner. Can you please tell me how to do this?
Your printer either has ink or toner, it cannot have both. Do you have an inkjet printer or laser printer?
In the Windows 10 OS desk top task bar, right click the printer’s icon and choose Canon LBP6000 or any other printer name from the pop-up menu. Once a printer’s name is chosen, a simple print queue window appears. And from it cancel the document or any other document listed on the queue. It may take a couple of minutes to clear the printer queue. After it is cleared, the printer can be switched on without the chance of printing the same document again.
I replaced the black ink cartridge #200 Epson – Model XP-310. Not working this time – must I replace ALL the colors? I have reinserted several times – gone through set up but it still says
“replace ink cartridge” ?
Hey guys, I normally have no trouble changing out one ink cartridge for the next. However, I normally use the XL version of ink 252 for all of my inks. Currently trying to use a regular size cartridge and being given an error code 0x69 and told to restart printer or told that the lid to secure the inks is not on properly. I have replaced the new ink with the old and not received this error.
Please tell me if there is anything I can do.
The standard 252 is smaller than the XL but it should fit easily into the same slot with no problem. Does the cartridge click into place and is level with all the other cartridges? It’s difficult to troubleshoot without actually being there. Did you restart the printer when you got the restart printer message? Try unplugging the printer cable when you restart. Leave the printer turned off for 15 minutes and then plug it back and start it up again. The lid message should only come if it does not snap in place properly.
How to replace Epson WF-2760 ink 220 How do I get the ink receptor to move to reveal cassets for removal & replacement?
we cannot not find the 220-1 ink for a WF2750. everywhere we have tried to get theses sends 220XL, we have several.. this is an Epson printer. wall mart used to carry the 220-1 not anymore. our printer is about a year old.
Do the 220 cartridges not work with your Epson WF2750? Epson 220 cartridges are the correct ones for the WorkForce WF-2750.
I find this printer the hardest printer to change ink cartridges. I have a WF2750 and I cannot for the life of me get a new cartridge in What am I doing wrong. follow the instructions given and that does not work
Epson WF-2750 won’t go a setting to allow ink cartridge access and replacement. Very frustrating. Never again an Epson.
how do you reset ink level
Hi Joanne, which Epson cartridge are you using? Most cartridges are equipped with a new chip so the ink levels do not need to be reset. Please let us know which cartridge you have and we can get you the right information!
I have put in 2 new cartridges and I am getting “communication error” ?
Hi Janette, if you are getting a communication error on your machine there is some quick troubleshooting you can do to try and get your cartridges working properly. Remove the cartridges from the printer. On the end of each cartridge you should see some gold contact points. Wipe these contact points with a lint free cloth, then reinstall the cartridges in the printer and try printing again. Sometimes fingerprint oil or dust can get on those contact points and cause a faulty reading in the printer. You can also try doing a hard reset on the printer. With the cartridges installed, power down the printer and unplug it from the wall for about a minute. Then plug it back in, power it back up and try printing again. Hope this helps!
Good night I bought at Amazon, several cartridges (212) for an Epson xp 4100 printer and I accept them without problem what happens is that the printer fimrware was updated and I do not accept the cartridges the light stays blinking and I don’t know how reset it to use them again, I am using a google translator I write from Venezuela, thanks in advance and I would like you to help me solve the problem
Some firmware updates prevent third-party or non-Epson brand cartridges from printing. If this update is stopping your cartridges from working you may need to wait until a new version of the cartridge is released that is compatible with that firmware update, or try and find a download that will revert the firmware. We recommend turning off the automatic firmware updates on your printer, that way your printer is protected and you can keep using your cartridges if another firmware update comes around. We show you how here: https://support.ldproducts.com/hc/en-us/articles/360024010133-How-to-Turn-Off-Epson-firmware-updates
I followed all instructions and keep getting an error message.
Kindly advise please, thanks,
Linda
Hi Linda, I am sorry you are having trouble with your Epson printer. Which printer model do you own and what is the error message that comes up?
I have an Epson (C11CH45401) Epson Expression Photo XP-970. I cannot remove the ink cartridges to replace them. They appear to be stuck. everything else appears to be OK. I am reluctant to use pliars or a screwdriver to try to force the cartridge up.